Securing your CI/CD Pipelines
Introduction
This project was developed by Joshua-jebaraj
Motivation
The Main Motivation of this project is to learn how to implement the Security using CI/CD
For Deploying the application I took Simple Python-application developed by we45
The complete code for the deployment can be found at My-GithubRepo
The Guide can be found here
The Project covers the below Topics
⚠ Note This project was developed only for learning purpose
SAST
- SAST stands for Static Application Security Testing
- It is the methodology for finding the security flaws in the application from the source code
- It is White-box Security testing methodology
In SAST phase we are going to perform below scan
| Tools | Uses |
|---|---|
| SCA | Scan for security flaws in dependency |
| Secret Scanning | Scan for sensitive information in the codebase |
| SAST | Scan for security flaws in the application code |
SCA
SCA stands for the Source Composition Analysis here we are scanning the dependency (eg library) used in the application for security vulnerabilities
Since the application is based on the python I am going to use Pyraider tool which helps
Github actions
Below is the Github action for performing the SCA
name: sca

on:
  push:

jobs:
  checkout-repo:
    runs-on: ubuntu-latest
    steps:
    - name: Checkout 🛎️
      uses: actions/checkout@v2
    - name : Installing the sca
      run : |
        pip install pyraider
        cd app
        pyraider check -f requirements.txt
References
- https://pypi.org/project/pyraider/
Secret-Scanning
Developers often tends to embed the sensitive information like apikeys,passwords and push it to the code-base When the attacker able to get access to the sensitive information they can use these credentials and abuse the application
To prevent the secret pushed into the code base we are going to use the tool called truffleHog which scans the repository for sensitive information like passwords,API keys
Note The above technique I am using is only to able to scan for the secrets in the source-control after it is pushed Ideally you should have precommit hooks inorder to prevent the code being commit
TruffleHog is the python based tool used to scan the repositories the sensitive information
Github Action
name: secret-scanning

on:
  push:

jobs:
  checkout-repo:
    runs-on: ubuntu-latest
    steps:
    - name: Checkout 🛎️
      uses: actions/checkout@v2
    - name : Installing secret-scanning tool
      run : |
        pip3 install truffleHog
        truffleHog --regex --entropy=False .
References
- https://github.com/trufflesecurity/truffleHog
SAST SCAN
In this SAST phase we are going to scan through the application source code for security flaws
Since the application is based on Python I am going to use the tool called bandit
Github actions
name: sast

on:
  push:

jobs:
  checkout-repo:
    runs-on: ubuntu-latest
    steps:
    - name: Checkout 🛎️
      uses: actions/checkout@v2
    - name : Installing the bandit tool
      run : |
        pip install bandit
        bandit -r app
References
- https://pypi.org/project/bandit/
DAST
- DAST stands for Dynamic application security testing
- It is the methodology for finding the security flaws in the application when running
- It is Black-box Security testing methodology
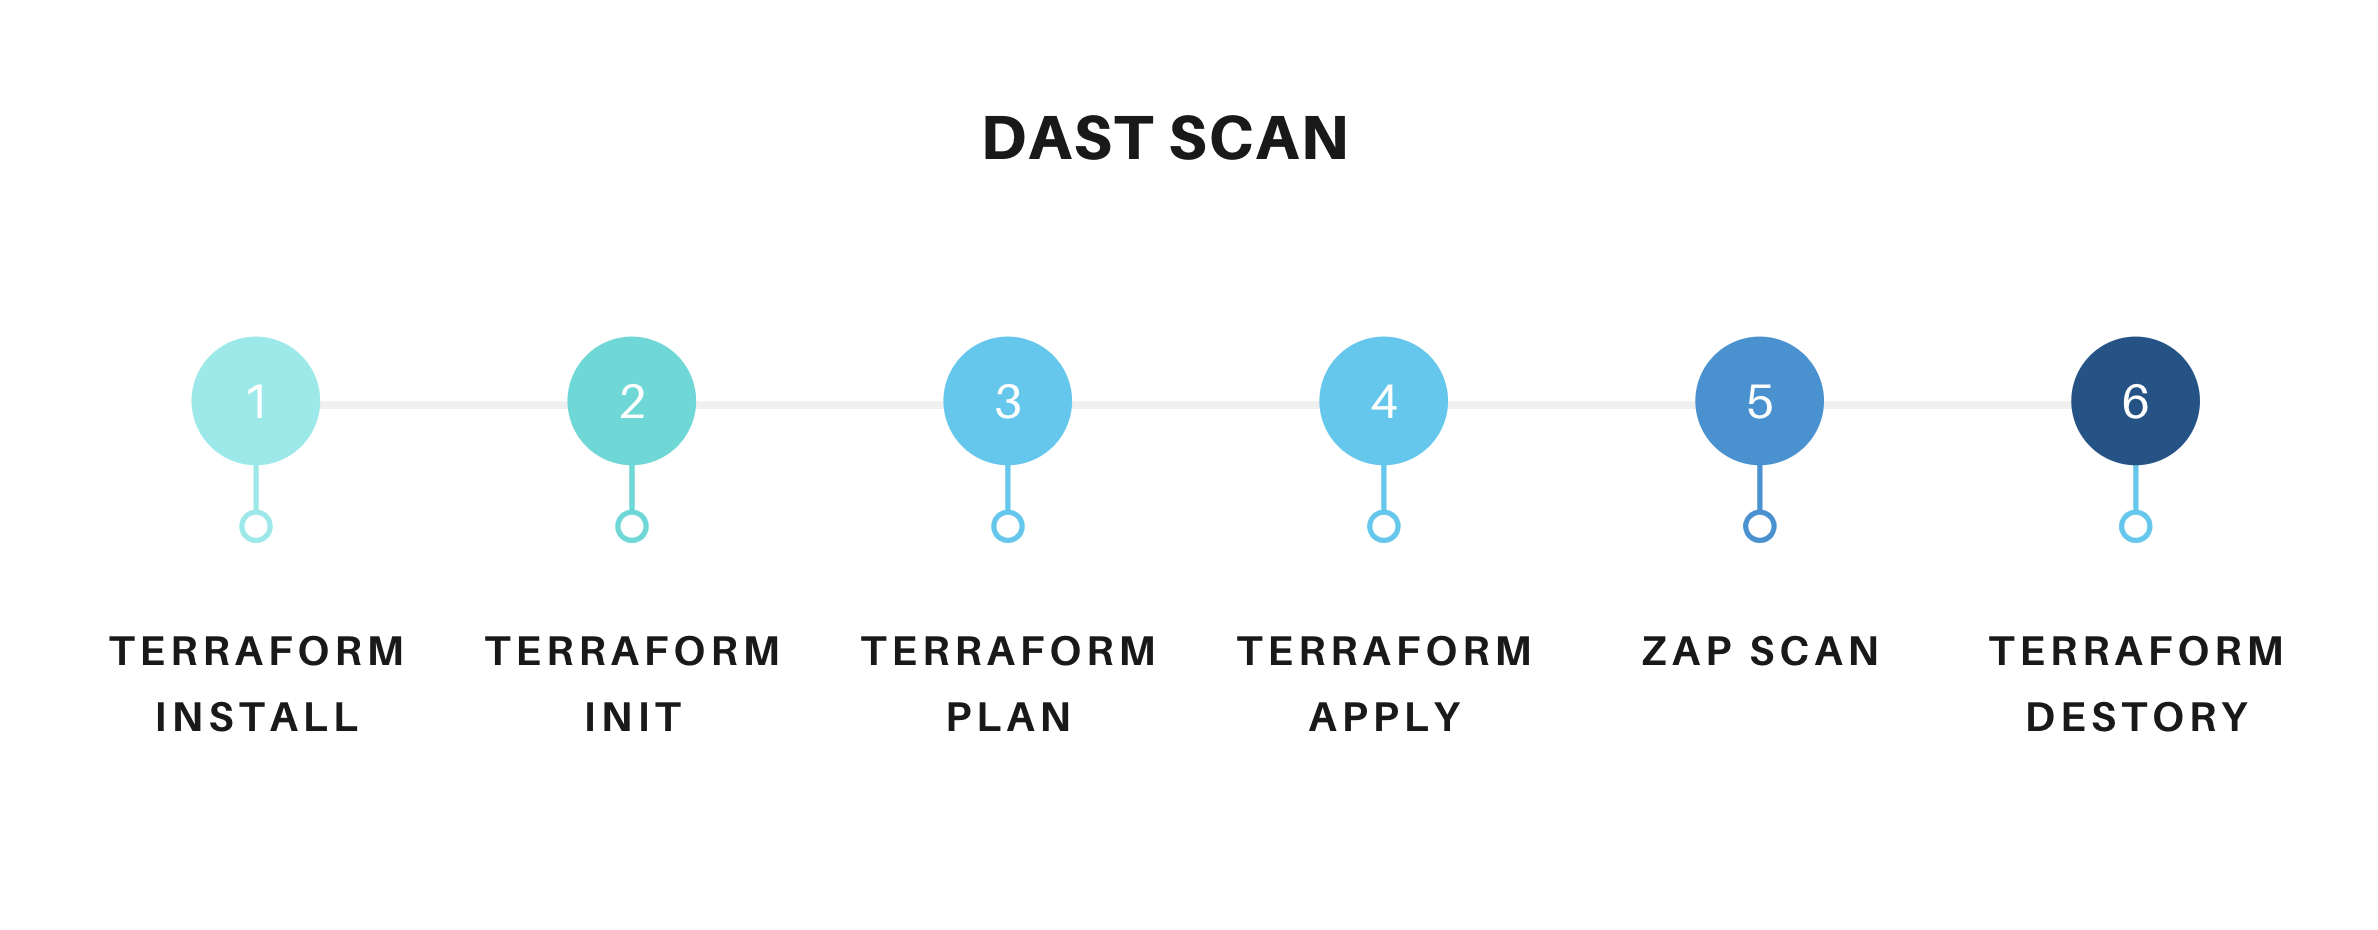
For performing the DAST I am going to use the ZAP to scan the web-application for security flaws. To provision the Infra I am going to use the Terraform and spin up the simple server and deploy the application and run the zap against the application deployed on the server and tear down the Infrastructure after the scanning is done
Pre-requisite
Before Implementing the Github Actions there are couple of steps need to be done
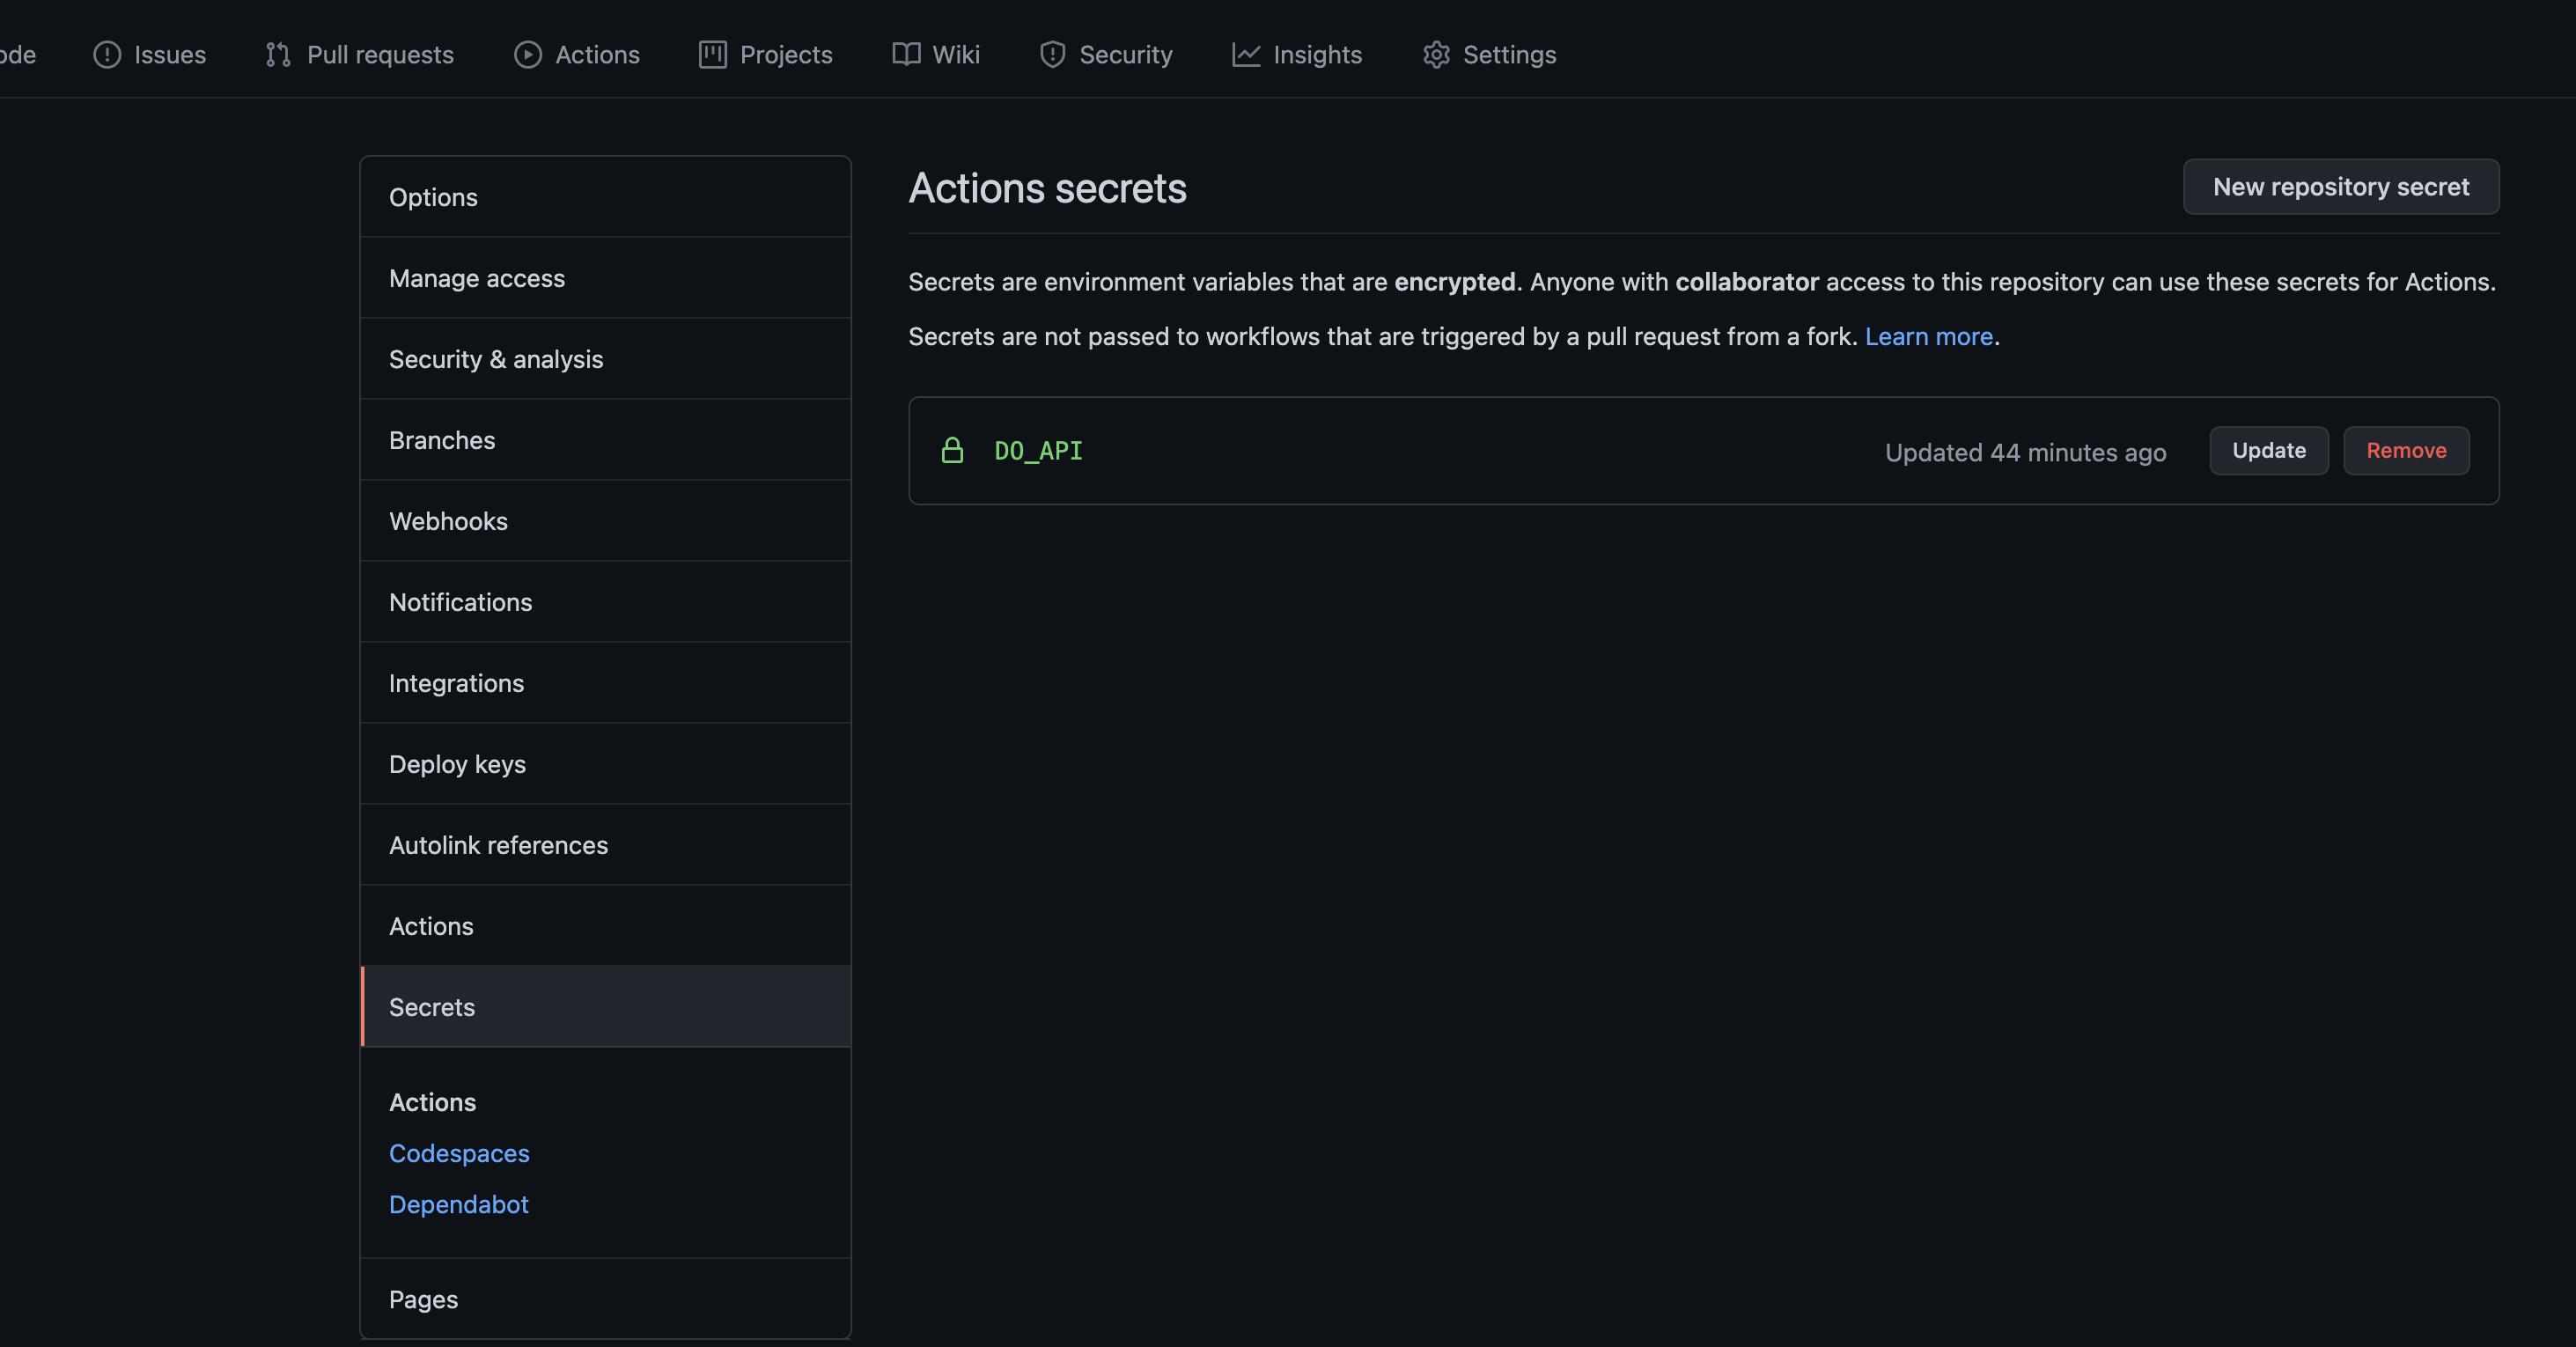
- Go to the Digital-Ocean and create the Personal token with write access
Copy the value of the Token Store it in the GITHUB_SECRETS
Github Actions
name: Dast

on:
  push:

jobs:
  checkout-repo:
    runs-on: ubuntu-latest
    steps:
       - name : Install terraform
         run : |
          sudo apt-get update && sudo apt-get install -y gnupg software-properties-common curl
          curl -fsSL https://apt.releases.hashicorp.com/gpg | sudo apt-key add -
          sudo apt-add-repository "deb [arch=amd64] https://apt.releases.hashicorp.com $(lsb_release -cs) main"
          sudo apt-get update && sudo apt-get install terraform
          terraform version

       - name: Checkout 🛎️
         uses: actions/checkout@v2
       - name: Provision the Infra
         run : |
          cd infra
          sed -i 's/secret/${{ secrets.DO_API}}/g' terraform.tfvars
          cat terraform.tfvars
          ssh-keygen -m PEM -f pentest_key -N ""
          ls
          terraform init
          terraform plan
          terraform apply --auto-approve
          GITHUB_IP=$(terraform output --raw ip_address)
          GITHUB_URL=http://$GITHUB_IP:5050/
          echo "url=$GITHUB_URL"  >> $GITHUB_ENV
       - name: ZAP Scan
         uses: zaproxy/action-full-scan@v0.2.0
         with:
           target: "${{ env.url }}"

       - name: Destory
         if: ${{ always() }}
         run : |
            terraform destroy --auto-approve
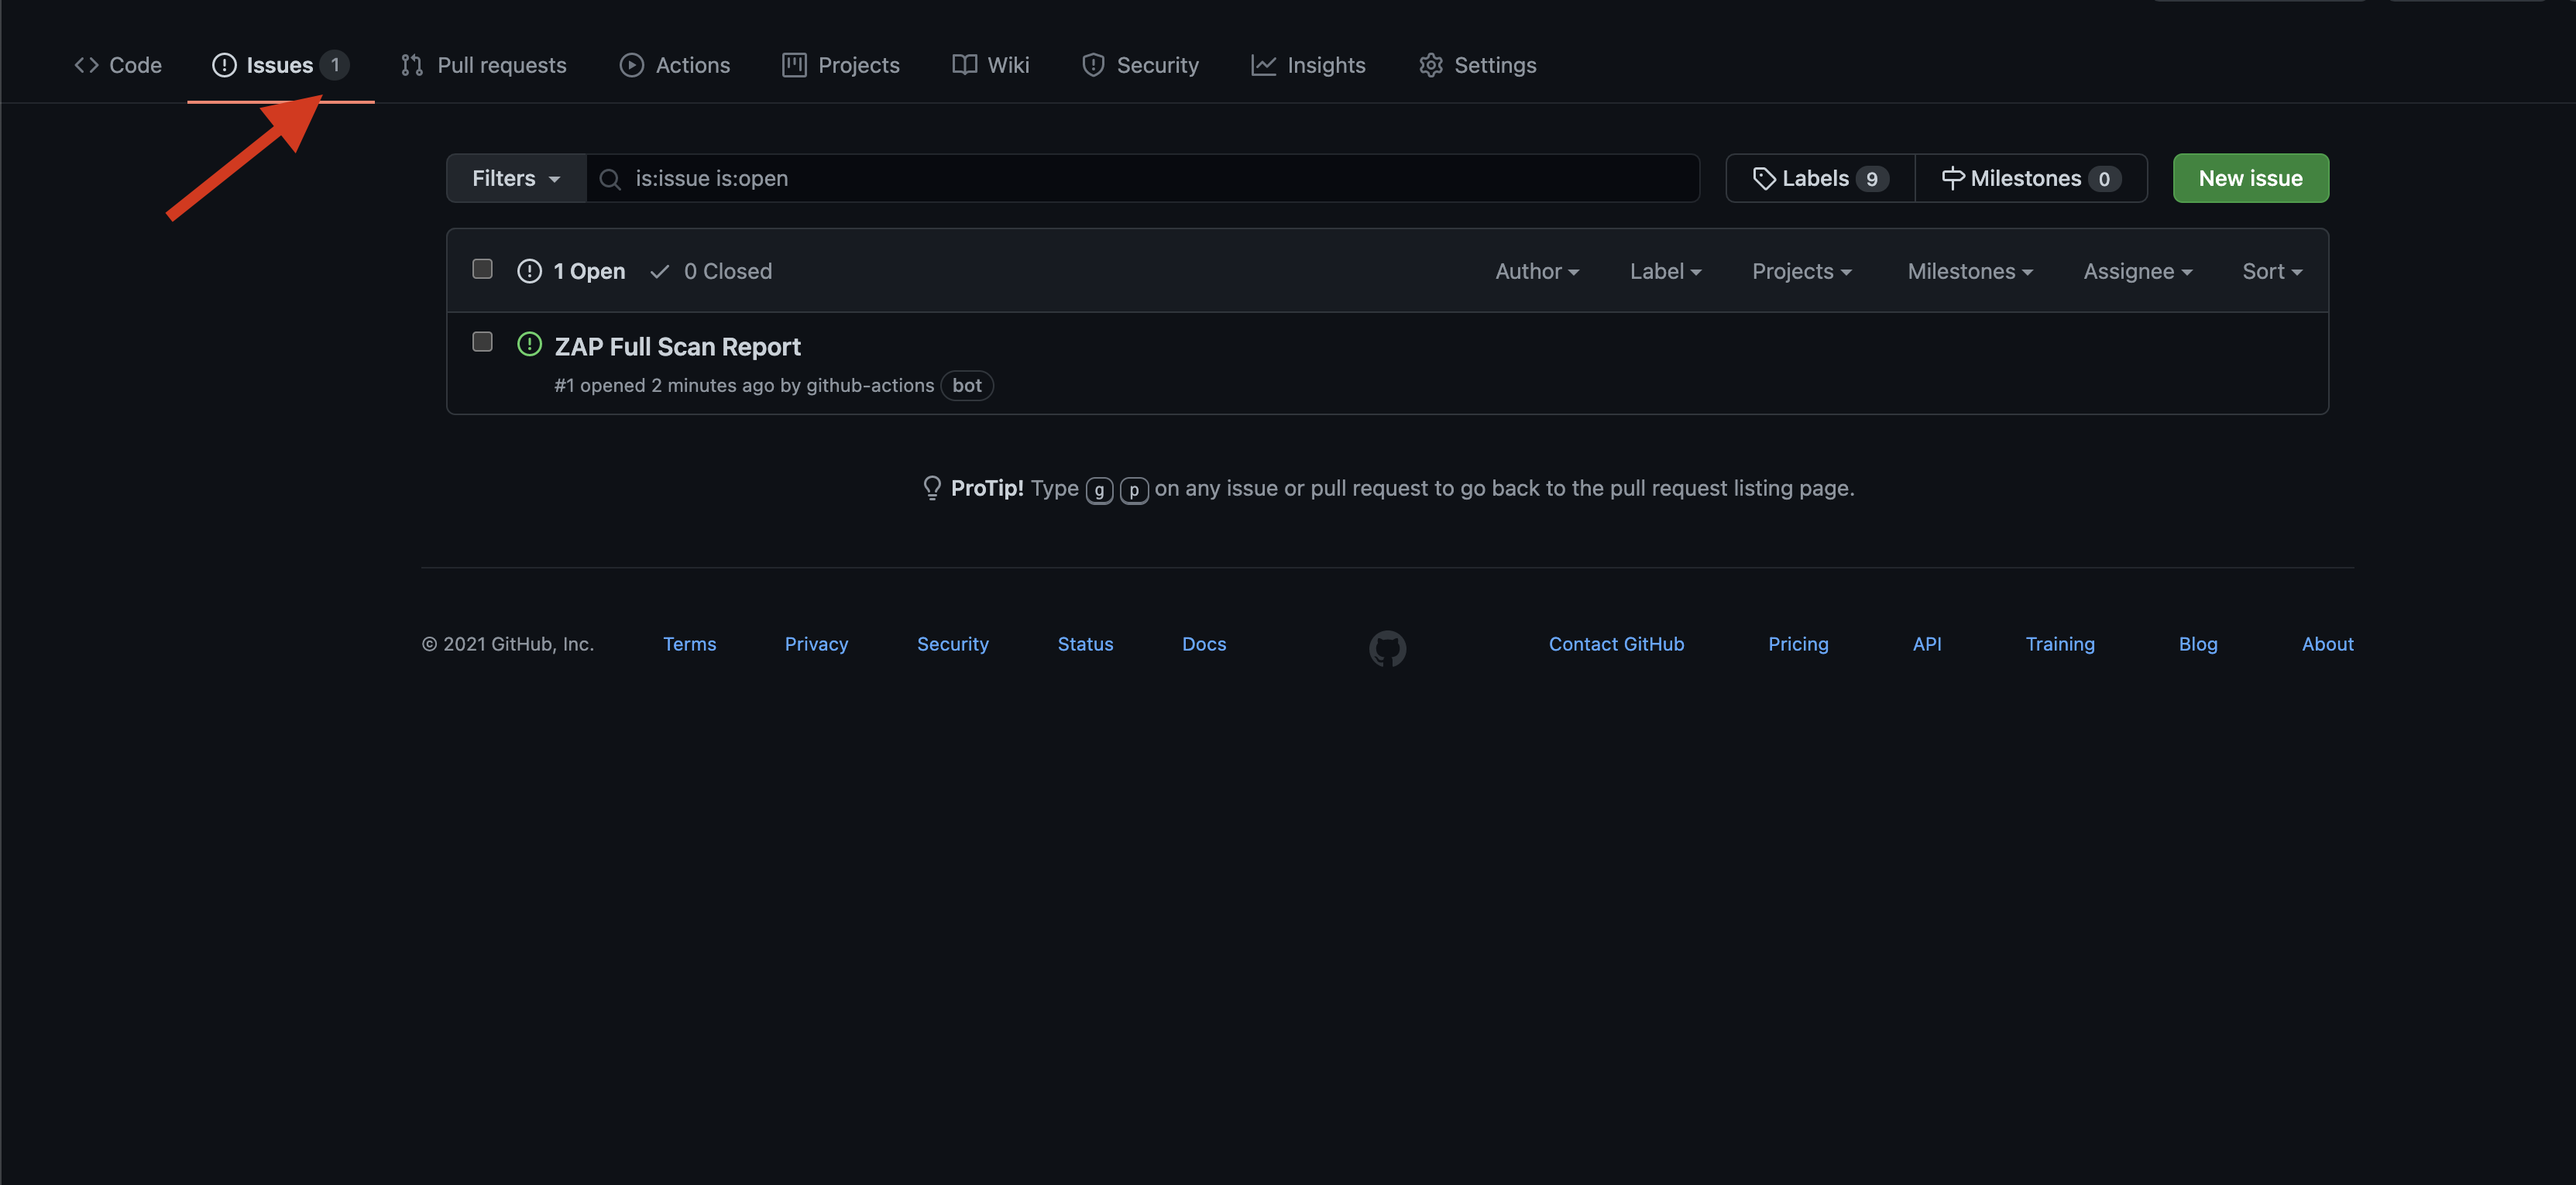
The result can be found under the Result section
References
- https://github.com/marketplace/actions/owasp-zap-full-scan
- https://github.com/salecharohit/do-pentest
Container Security
Now days most applications are deployed in a containerized manner We have to make sure the container that used for deploying the application is also secure
To Secure the Docker container I am going to use the below two tools
| Tools | Uses |
|---|---|
| hadolint | Scans the Dockerfile and suggest the best practices for building the Docker container from the Dockerfile securely |
| docker scan | Scan for security flaws in the Docker Image that created from the Dockerfile |
Github Actions
name: Container Scan

on:
  push:

jobs:
  checkout-repo:
    runs-on: ubuntu-latest
    steps:
    - name: Checkout 🛎️
      uses: actions/checkout@v2
    - name : Scanning for docker image
      run : |
        docker build -t test .
        docker scan test
    - name : Scanning for Dockerfile
      if: ${{ always() }}
      run : |
        docker run --rm -i hadolint/hadolint < Dockerfile
References
- https://github.com/hadolint/hadolint
- https://docs.docker.com/engine/scan/
Infrastructure security
Even though we use the containers for deployment we have to make sure the underlying infrastructure is also secure.To harden the underlying Infrastructure I am going to use Ansible. Ansible is configuration management tool that help to configure the servers via code. I am going to use Ansible-role to perform the set of task to harden the underlying Infrastructure
Github Actions
name: Infra-scan

on:
  push:

jobs:
  checkout-repo:
    runs-on: ubuntu-latest
    steps:
    - name: Checkout 🛎️
      uses: actions/checkout@v2
    - name : Installing ansible
      run : |
        sudo apt update
        sudo apt install ansible
        ansible-galaxy --version
    - name: Setting up the ansible
      run : |
           cd ansible
           echo "$SSH_KEY" >  pentest_key
           chmod 600 pentest_key
           echo "$IP" >> inventory
           ansible-galaxy collection install devsec.hardening
           ansible-playbook playbook.yaml

      env:
        SSH_KEY: ${{secrets.KEY}}
        IP: ${{secrets.IP}}
Reference
-
https://docs.ansible.com/ansible/latest/user_guide/playbooks_reuse_roles.html
-
https://dev-sec.io/
SBOM
Software Bill of material is list of components(third party) present in the Code
To generate the SBOM I am going to use cyclonedx
I am going to use CycloneDX Python Module to generate the SBOM since the application is based on the python
Github Action
name: sbom

on:
  push:

jobs:
  checkout-repo:
    runs-on: ubuntu-latest
    steps:
    - name: Checkout 🛎️
      uses: actions/checkout@v2
    - name : Installing the cyclonedx-bom
      run : |
        pip install cyclonedx-bom
        cd app
        cyclonedx-py
    - uses: actions/upload-artifact@v1
      with:
        name: report
        path: ${{ github.workspace }}/app/bom.xml
      name: 'Upload Package'
References
- https://www.synopsys.com/blogs/software-security/software-bill-of-materials-bom/
- https://github.com/CycloneDX/cyclonedx-python
Compliance as Code
Compliance as code as the name implies we are writing set of compliance-controls as the code To achieve compliance as code I have used Inspec tool Instead of writing the controls on my own I have used premade compliance check written by the community. I have used devsec linux profile to check my Infrastructure against the CIS compliance
Github Actions
name: Compliance as code

on:
  push:

jobs:
  checkout-repo:
    runs-on: ubuntu-latest
    steps:
    - name : Installing Inspec
      run : |
        curl https://omnitruck.chef.io/install.sh | sudo bash -s -- -P inspec
        inspec version
    - name: Setting up chef
      run : |
           echo "$SSH_KEY" >  pentest_key
           chmod 600 pentest_key
           inspec exec https://github.com/dev-sec/linux-baseline --key-files <key-location> --target ssh://root@$IP --chef-license accept


      env:
        SSH_KEY: ${{secrets.KEY}}
        IP: ${{secrets.IP}}
Reference
- https://github.com/dev-sec/linux-baseline
- https://docs.chef.io/inspec/install/